Salesforce
Prerequisites
-
Only Salesforce editions with API access are supported.
- Enterprise Edition
- Unlimited Edition
- Developer Edition
- Performance Edition
- The Saleforce OrgID must be supplied to your Account Manager prior to installation.
- Installation should be carried out by the organisations Salesforce Administrator.
- For further support contact [email protected]
Installation
To install the Salesforce integration applications, whilst logged on to your Salesforce instance, use the installer link provided by your Account Manager and follow the steps below.
1. Choose the appropriate option for install in accordance with your organisation's policy.
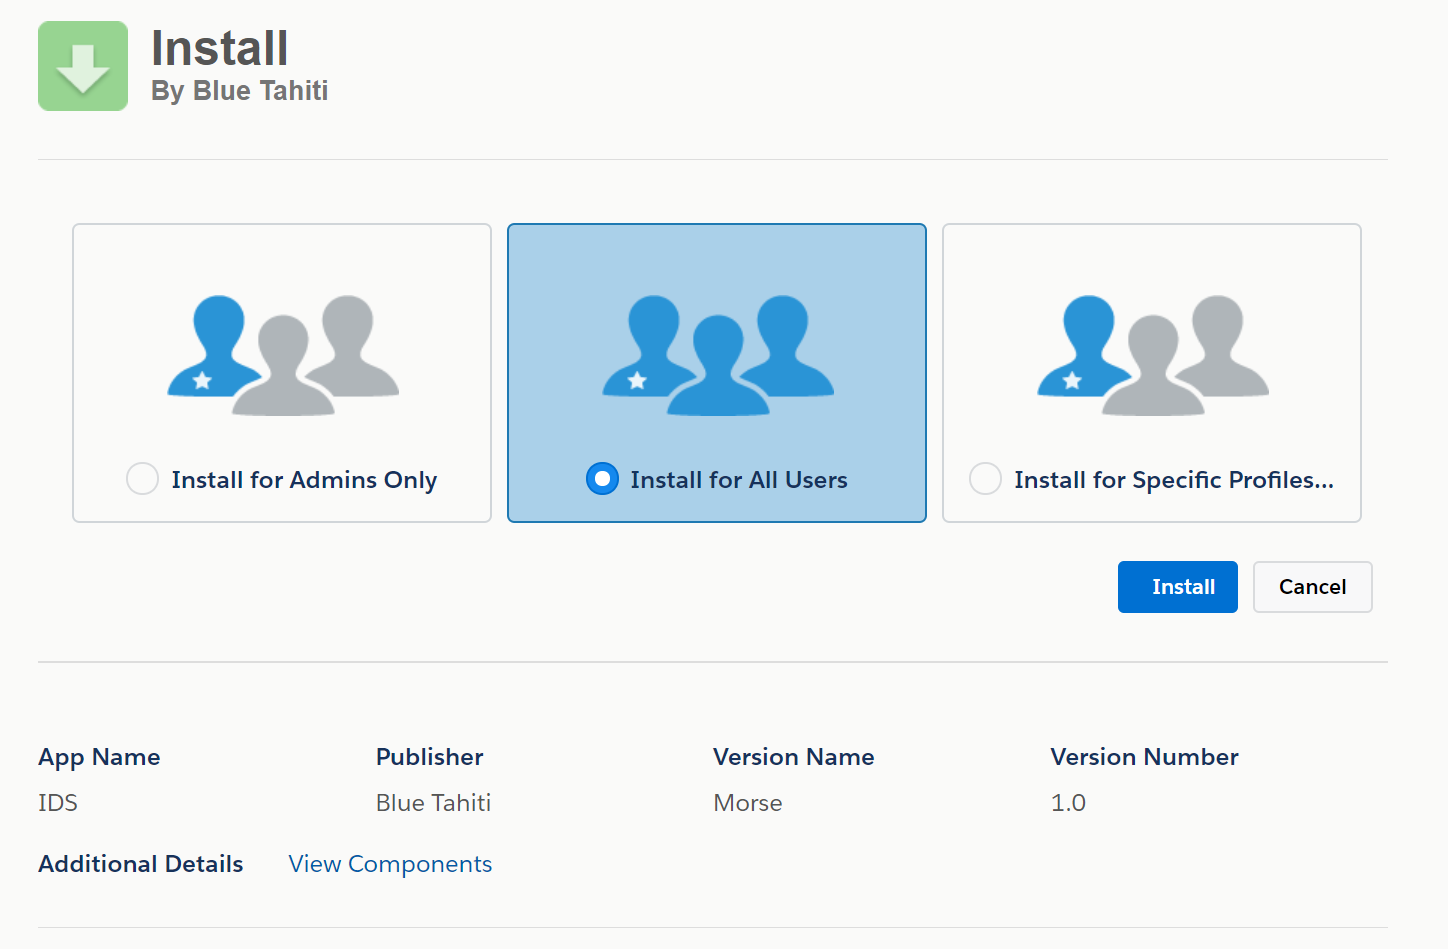
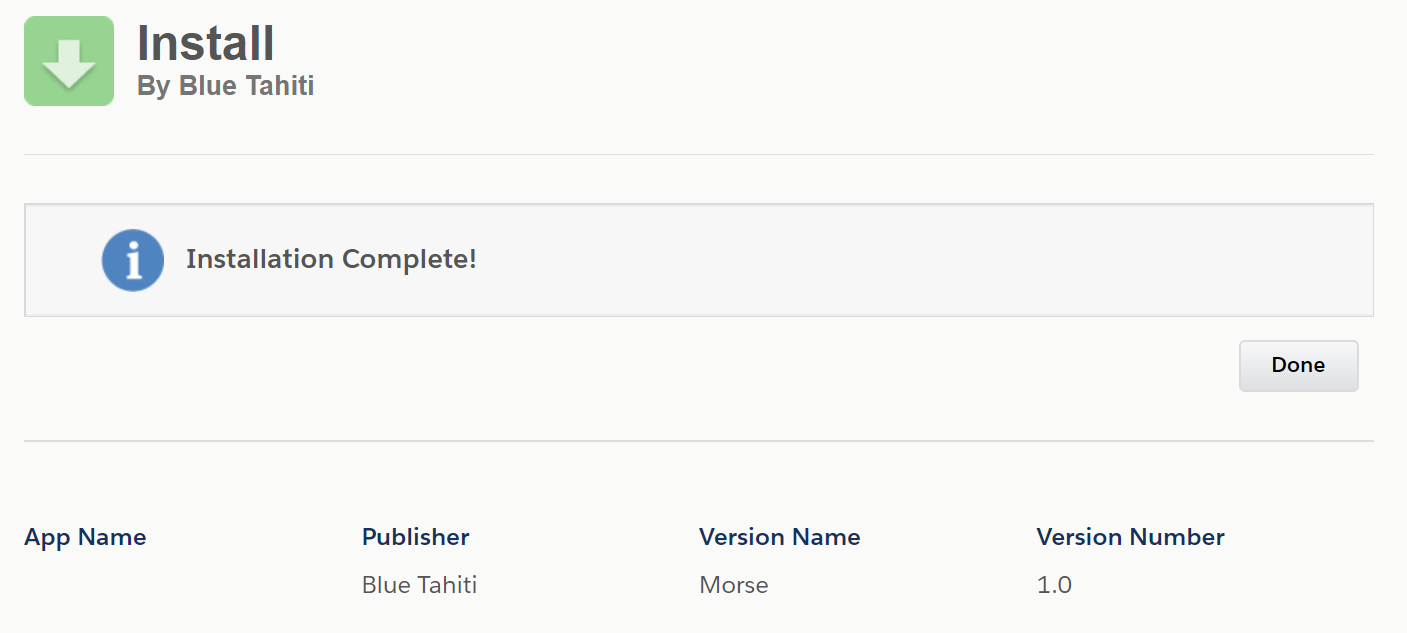
2. Once the install has completed click Done.
Setup & Configuration
Application permissions
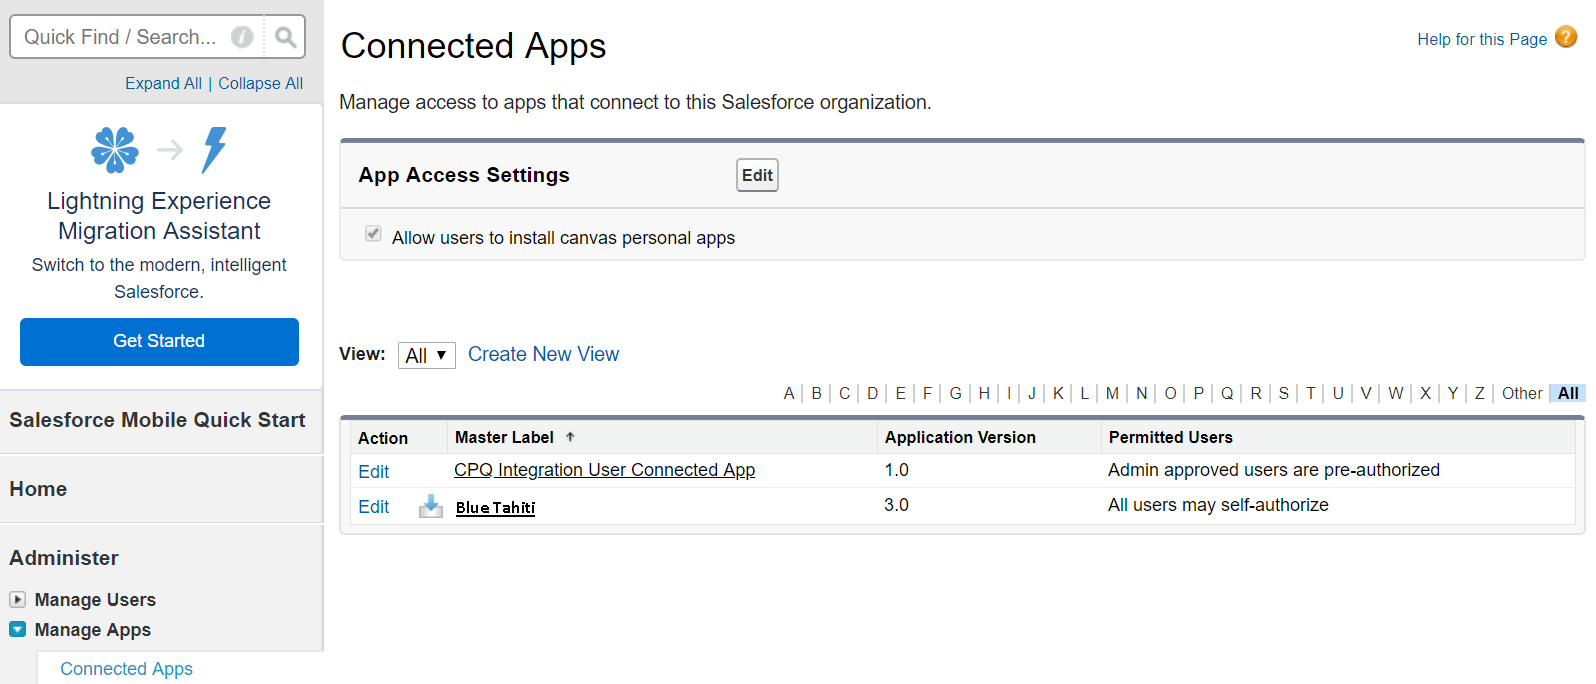
1. Navigate to Manage Apps > Connected Apps via the Setup menu.
Click the Blue Tahiti app link.
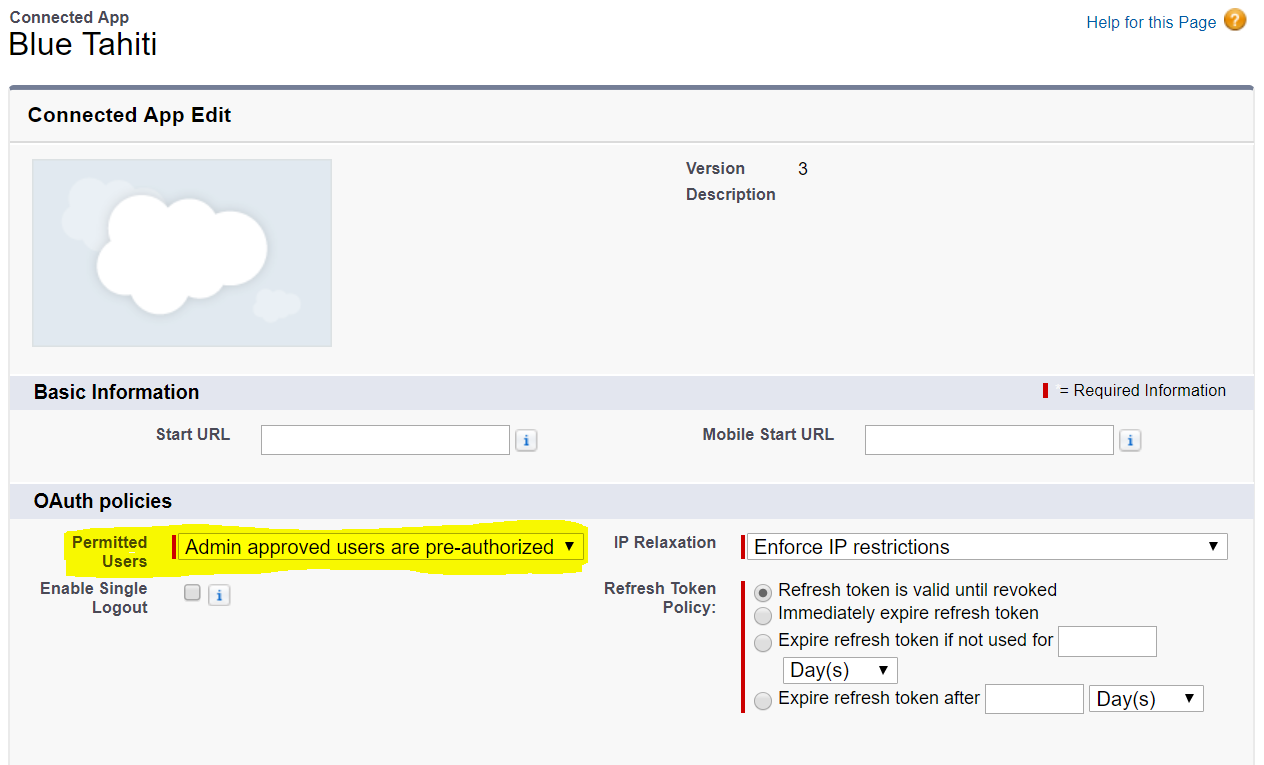
2. Click the "Edit Policies" button.
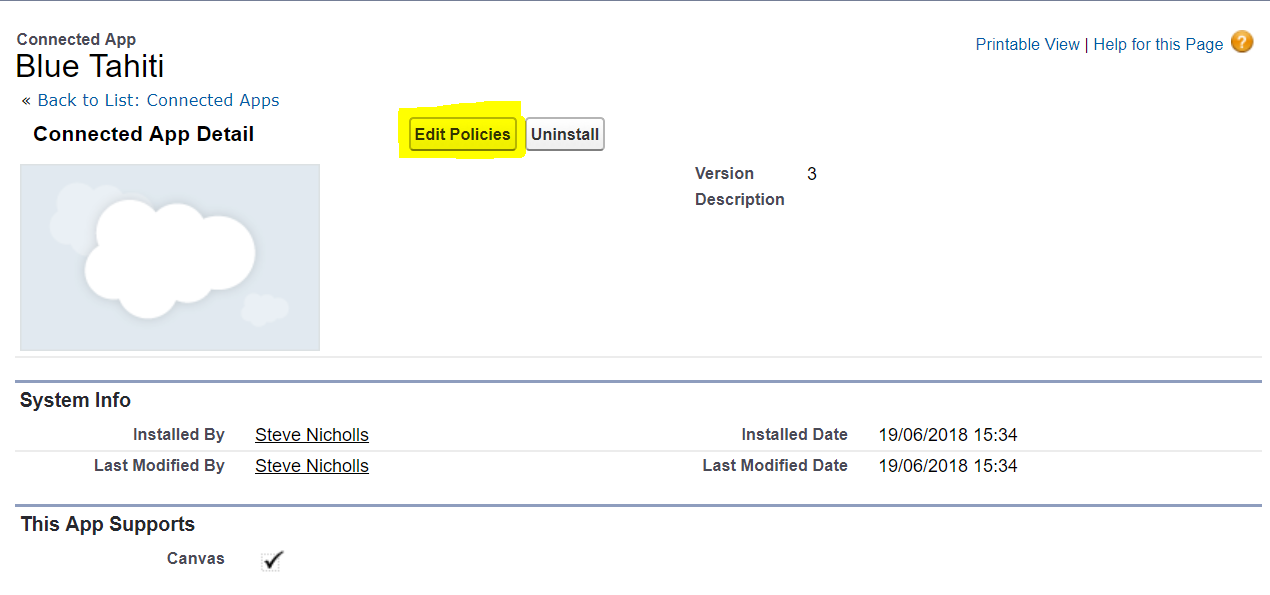
3. Change the "Permitted Users" option to “Admin Approved Users are pre-authorized”, then click Save.
4. Scroll down to the "Profiles" section and use the "Manage Profiles".
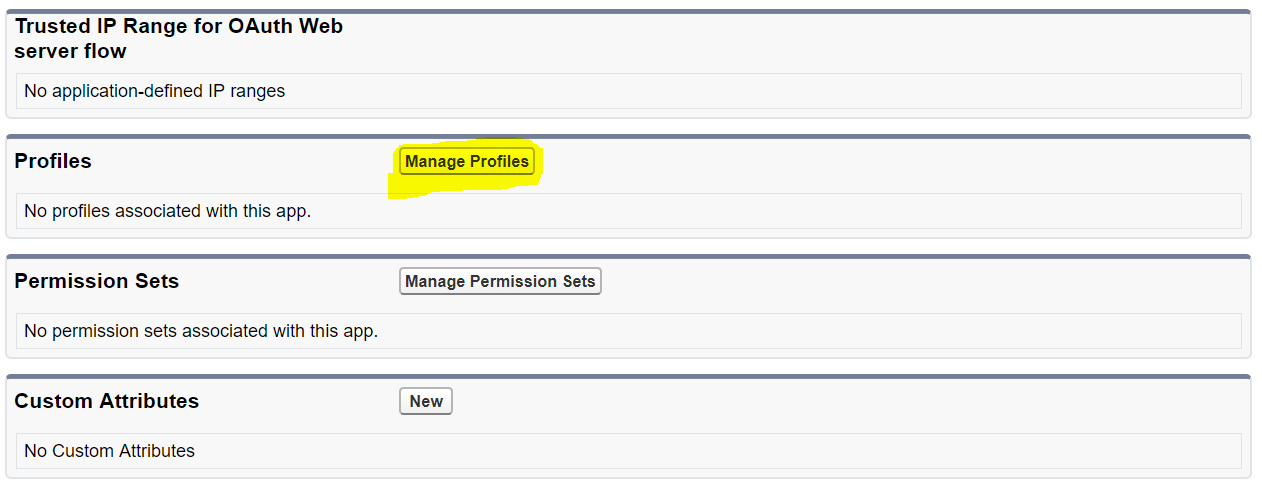
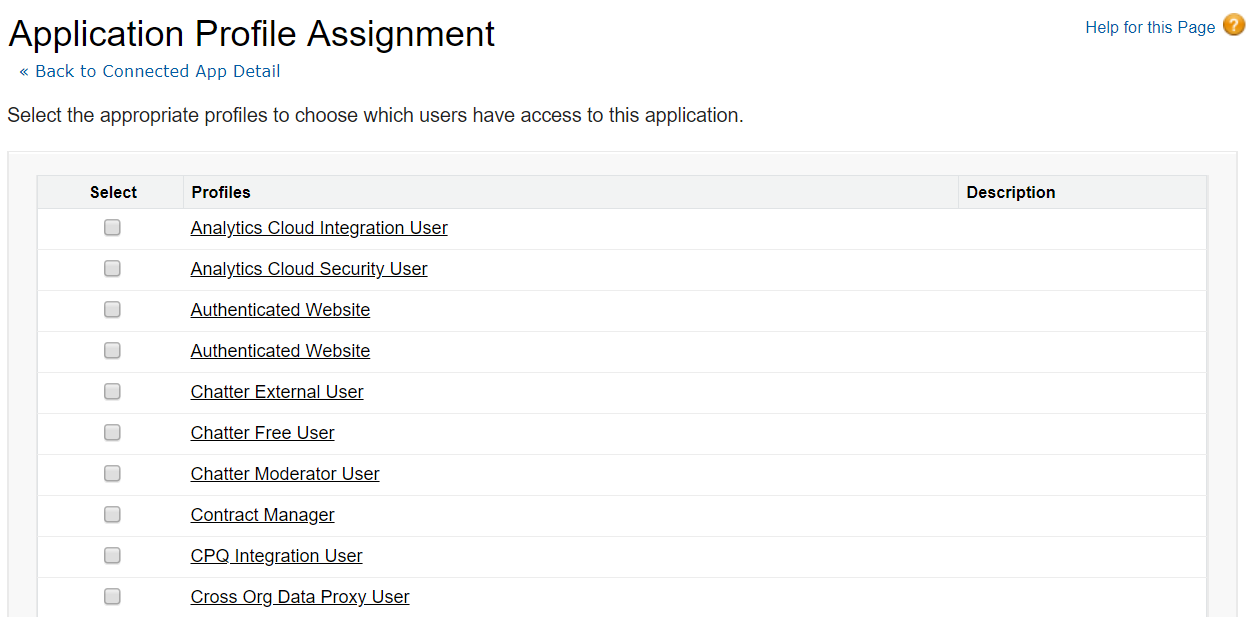
5. Select which profiles should have access to the app.
Record integration - Classic
- Go to Setup.
- Under Build, click the type of object you wish to add the application to the layout of, e.g. Account.
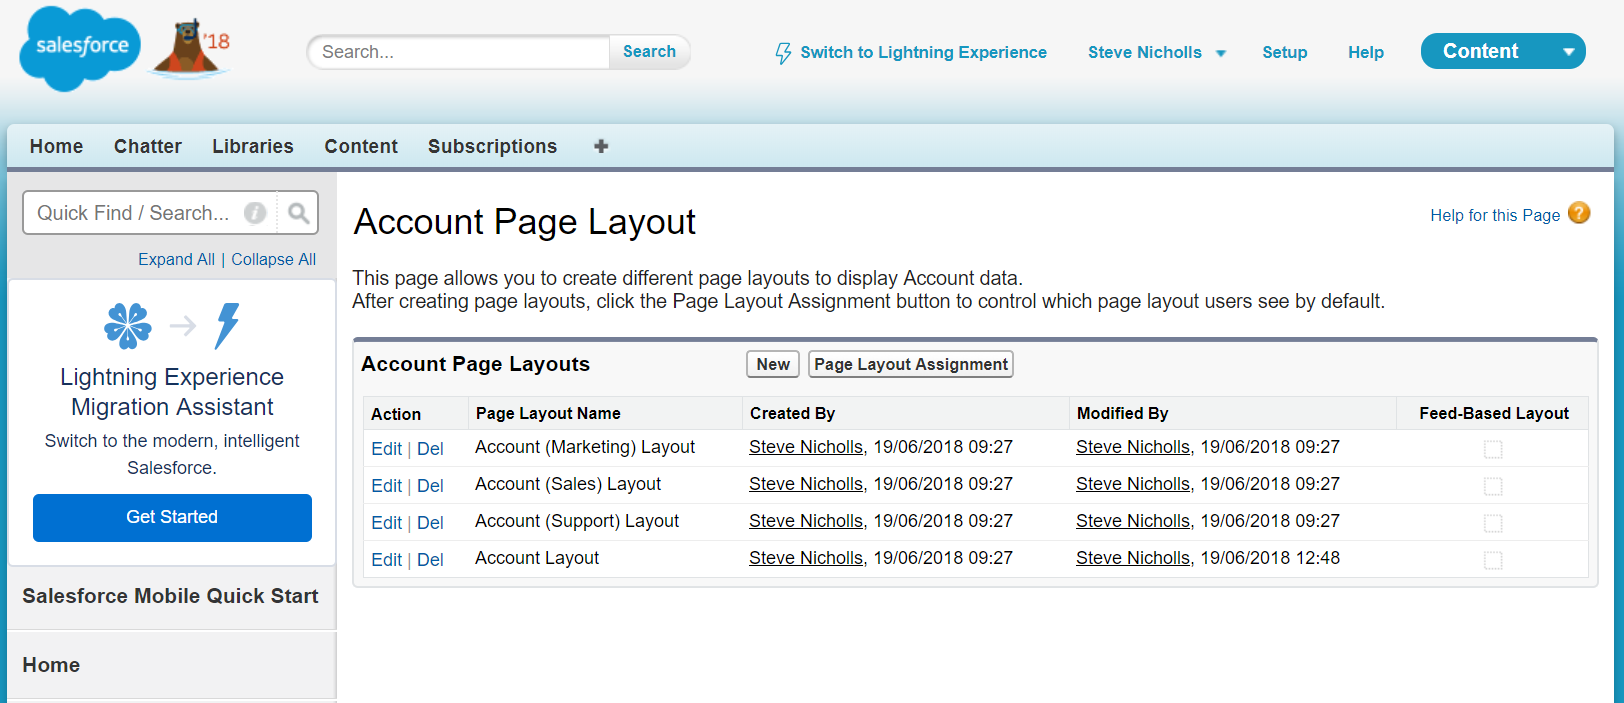
- Click "Page Layouts".
- Select the layout you wish to add the application to and click Edit.
5. Add a new 1-column section to place the application in and position it where required.
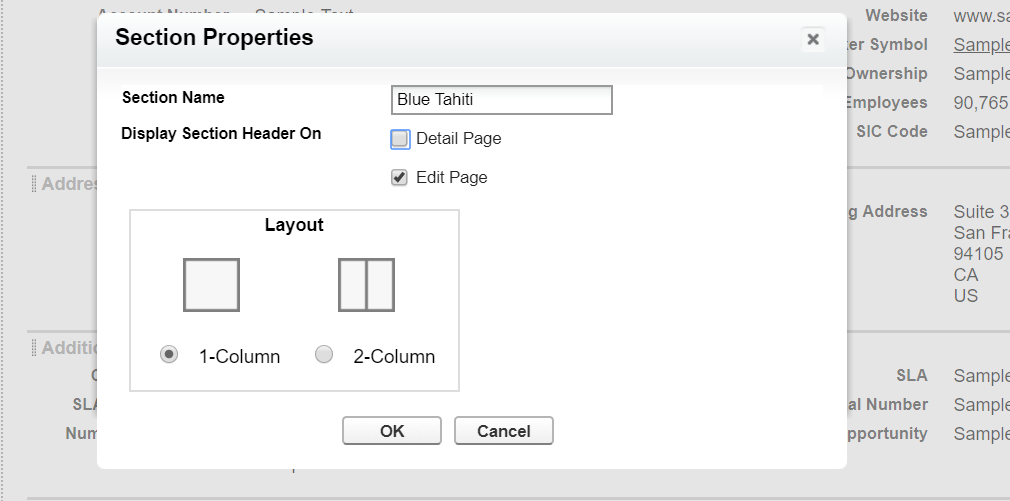
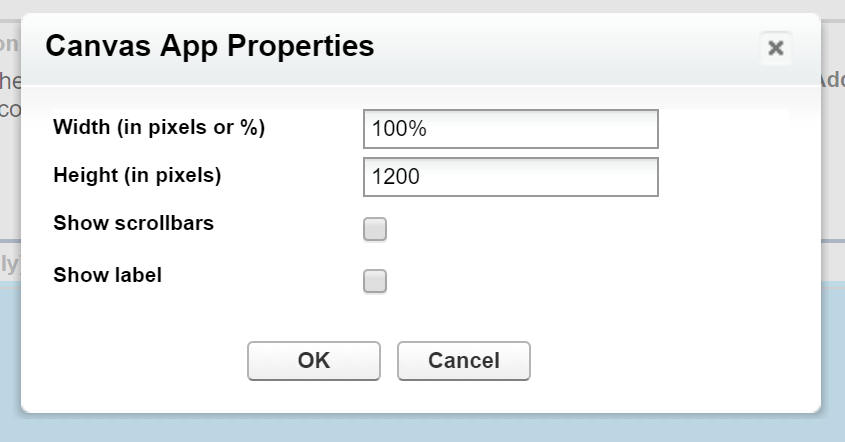
6. Drag the Canvas App "Blue Tahiti" into the section, then use the Properties option to set the height to 1200.
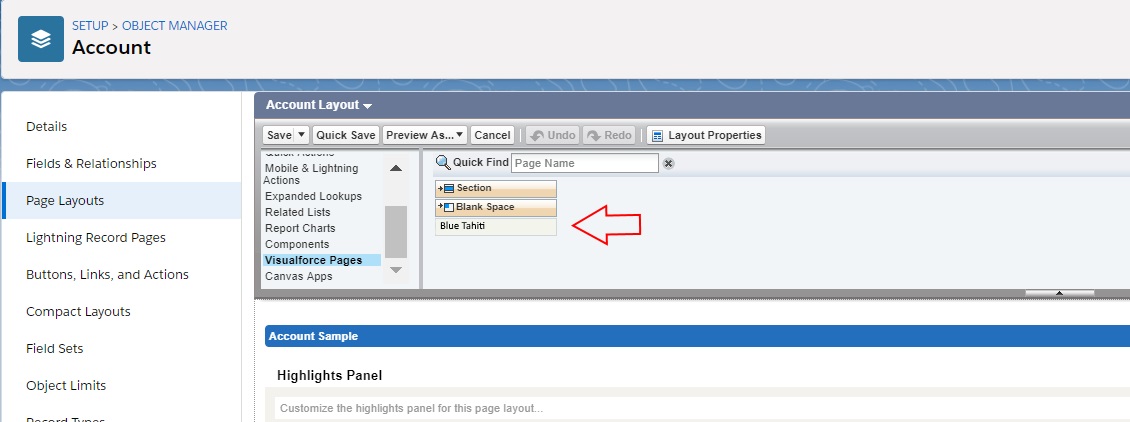
Record integration - Lightening
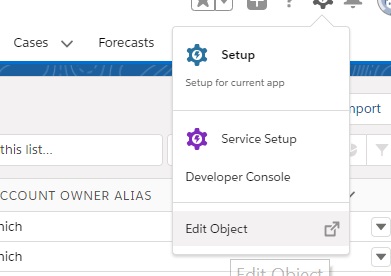
- While in an Account Go to Setup > Edit Object.
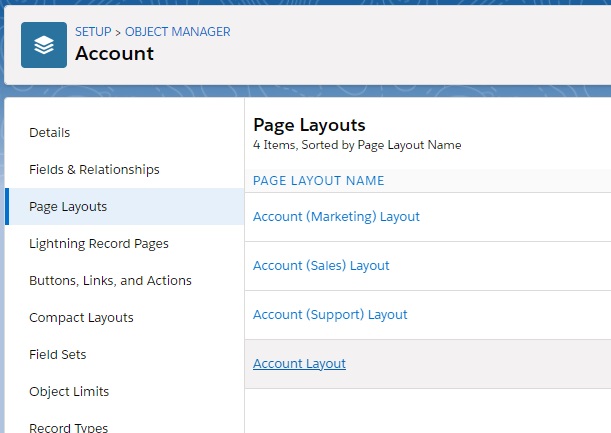
- Select Page Layouts, then click the type of object you wish to add the application to the layout of, e.g. Account.
3. Add a new 1-column section to place the application into, and position it where required.
4. Drag the Visual Force Page "e.g. Blue Tahiti" into the section, then use the Properties option to set the height to 1200.
Application Tab
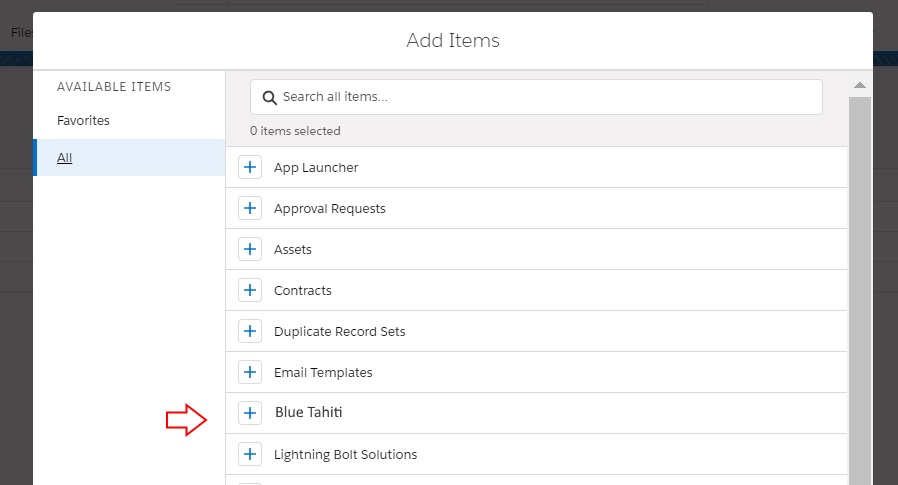
In Classic - From "My Settings", go to Display & Layout > Customize My Tabs, to add the Blue Tahiti tab.

In Lightening - In Personalize My Nav Bar, select Add More Items. Add the App and Save
Setting Mappings for Verify and Prospector
1. Click the Blue Tahiti tab. The Configuration screen below will load. Using the drop-downs, specify the mappings of the Salesforce fields to the available 3rd party data fields. Fields marked with a red asterisk are compulsory.
2. When all fields are mapped click Save Configuration.

The setup process is now completed and the landing screen is displayed.

Setting Mappings for the Schedulers
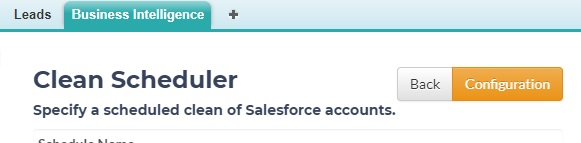
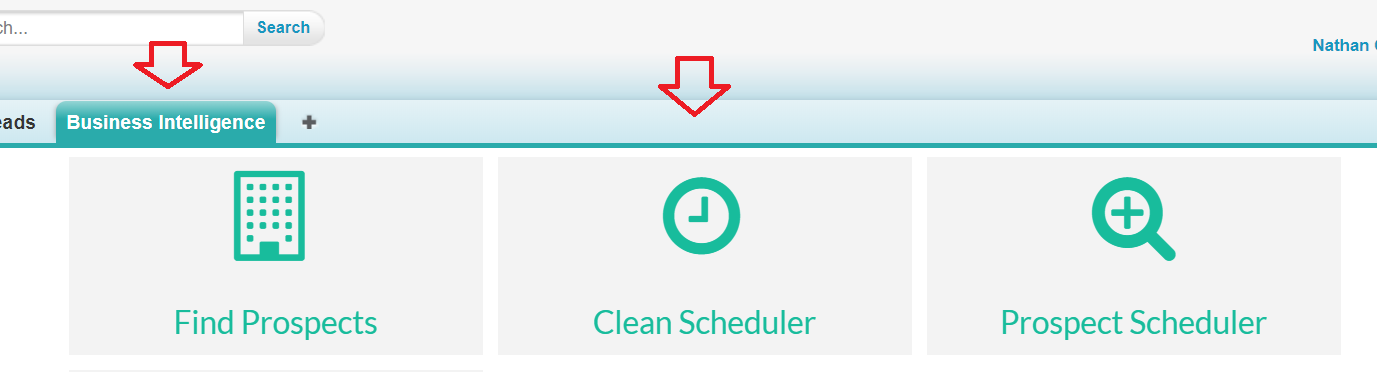
1. Click either the Clean Scheduler or Prospect Scheduler button on the Business Intelligence tab.
2. Click the Configuration button.
3. Enter the API credentials.
4. Using the drop-downs, specify the mappings of the Salesforce fields to the available 3rd party data fields. Fields marked with a red asterisk are compulsory.
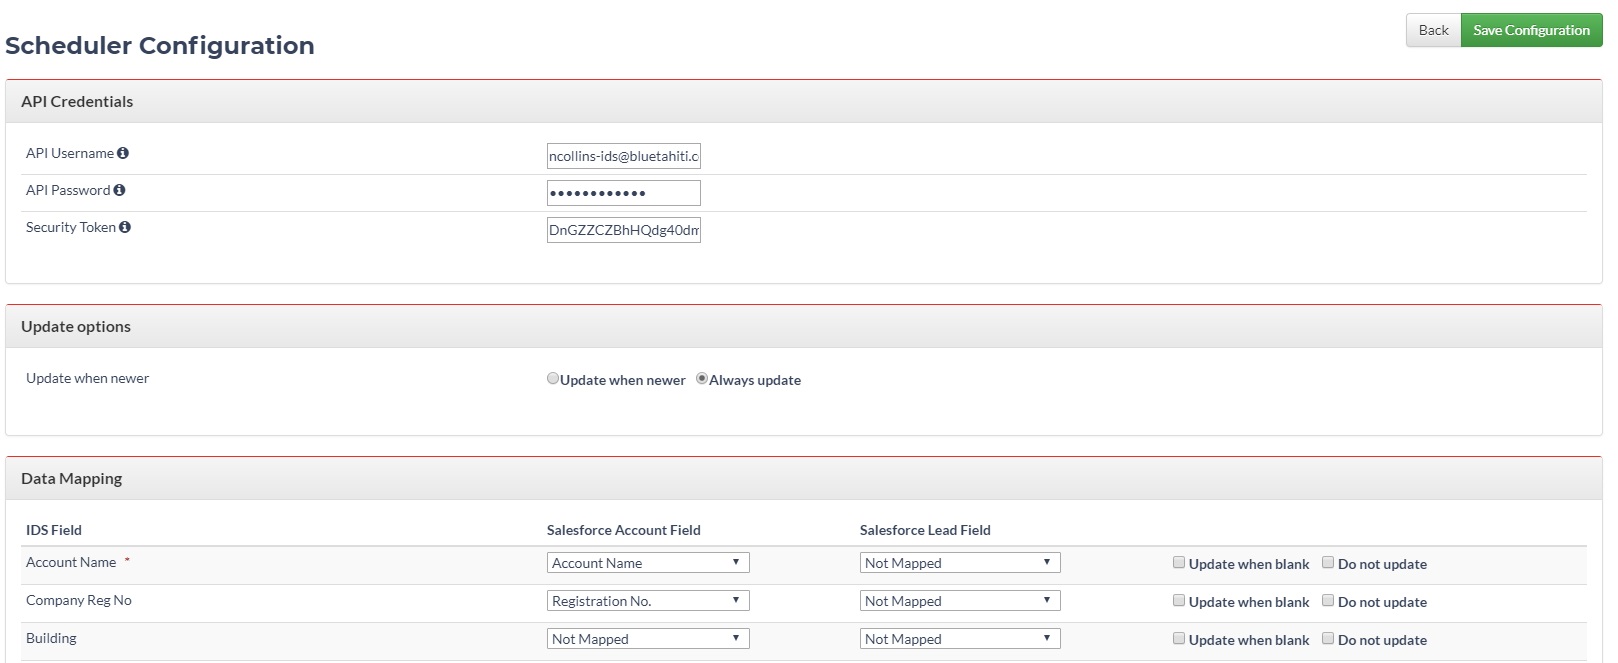
Update Options: If set to "Update when newer" the record will be updated if the last modified date in Salesforce is older than the reference data. If set to "Always update" then the record in Salesforce will always be updated with data from the reference data
"Update when blank" and "Do Not update" can be used to control whether a specific field is updated or not.
User Guide
Using the Verify feature
This functionality allows the user to correct or enhance a Salesforce record using 3rd party data to ensure the record is fit for purpose.
Updating a Salesforce Account or Lead with latest 3rd party data.
Verify displays inside an Account record; it searches the 3rd party data to find potential records that match the current Salesforce record.
Candidate matched records are displayed in “Company Matches”. The user selects the best match to the current Salesforce account using the “Select” button.
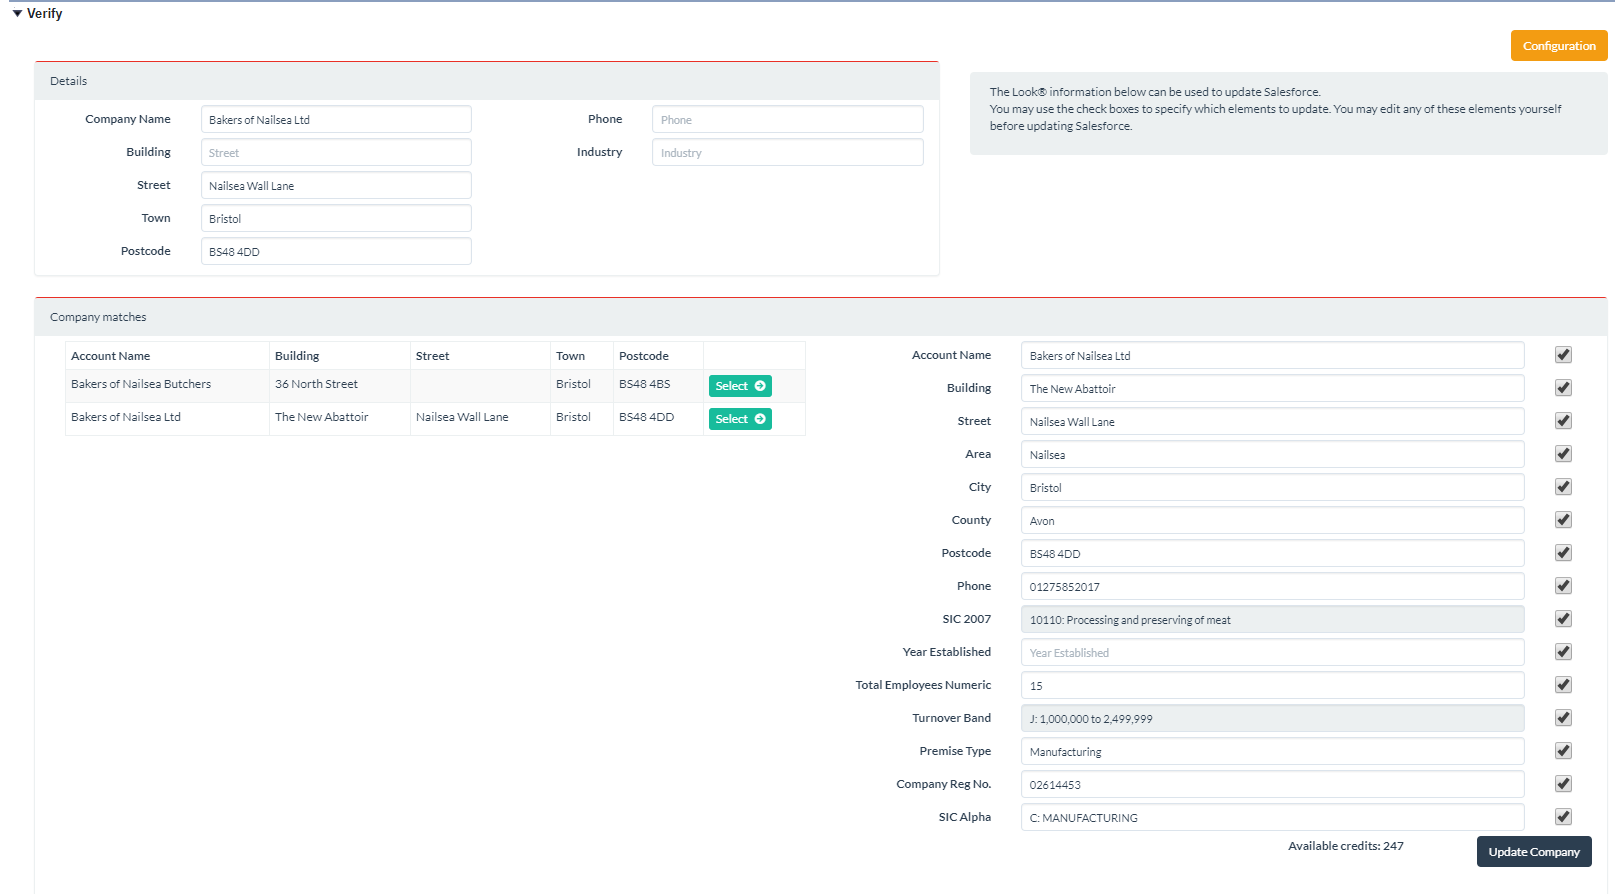 The 3rd party data is then displayed on the right-hand side for the user to review.
The user may then use the check boxes to specify whether or not the information is used to update the Salesforce Account.
The text boxes can be edited if the user wishes to over-write or add information.
When you are satisfied with the information, use the Update Company button to update the Salesforce Account record with the information selected. This will use 1 clean credit.

At any point in Verify, when a company has been selected, a Contact can be added if one is available on the 3rd party data. From the list of contacts, use the Select button to choose the contact to add, then click the Add Contact button to add to the Salesforce account. The will use 1 prospect credit. Any contact added in Salesforce Verify will be linked to the Account that is currently being viewed. Once updates an account or contact record can be reloaded to view the updated information.
Using the Prospector feature
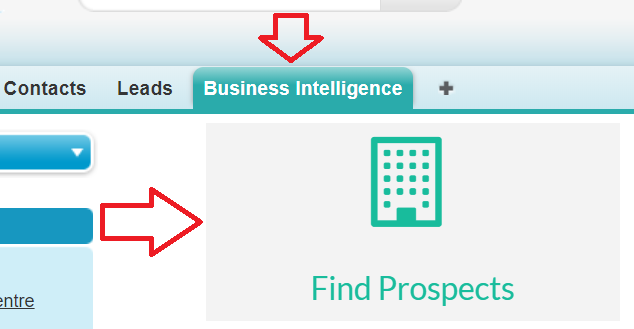
This functionality allows a user to search for targeted new prospects, directly from the 3rd party data, using appropriate criteria. To access the Prospector, click the Business Intelligence tab and click the Find Prospects button
Searching for prospects
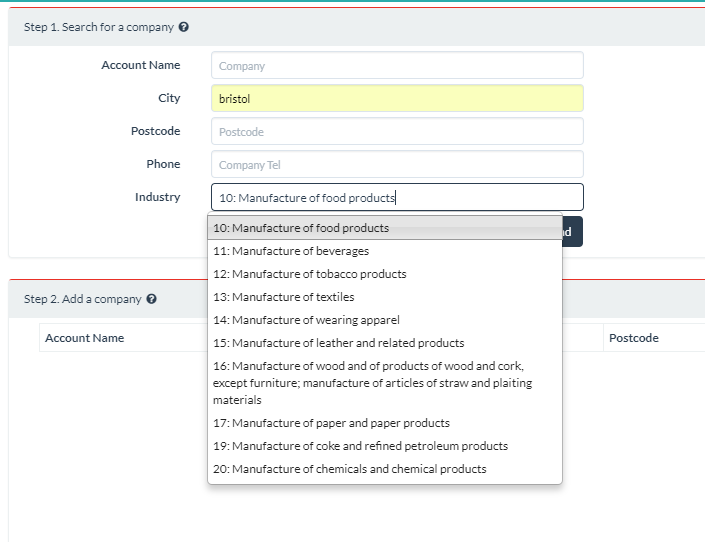
Once you open the Prospector application you have the option to search for companies, you must use at least two search criteria. The criteria options are:
- Company Name
- Town
- Postcode
- Phone Number
- Industry
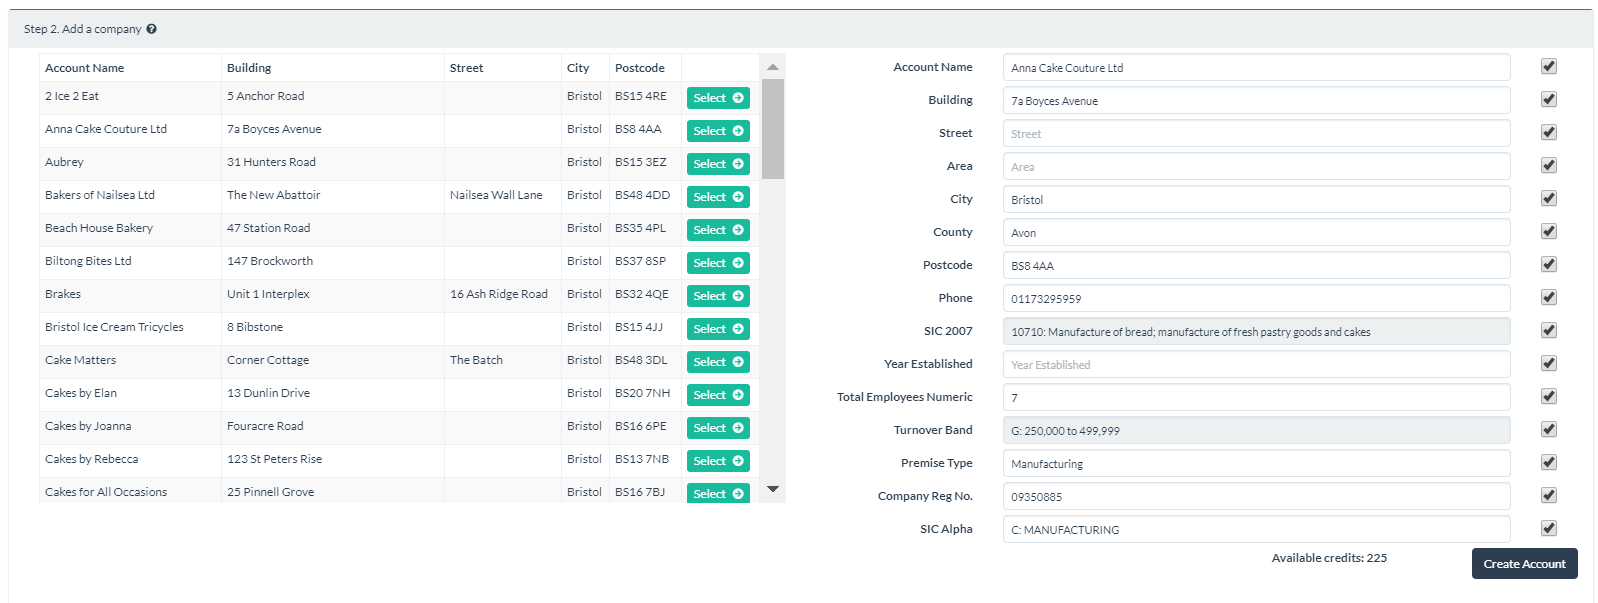
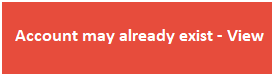
The user can review the result and select the appropriate record by clicking the Select button next to the required record. This will display the 3rd party information about the record. The user can edit the data in the text boxes, or use the check boxes to determine whether or not the data is sent to the Salesforce account when it is created. When the Account is ready to be created, click the “Create Account” button. This will use 1 prospect credit. If the account is successfully added a message will show with a link to open the new account.

If the account aleady exists a message will appear with a link to open the existing account
Once the Account has been created the “Add Contact” button becomes active. Here the user can select a contact that is available on the 3rd party data, to add as a Salesforce Contact record.
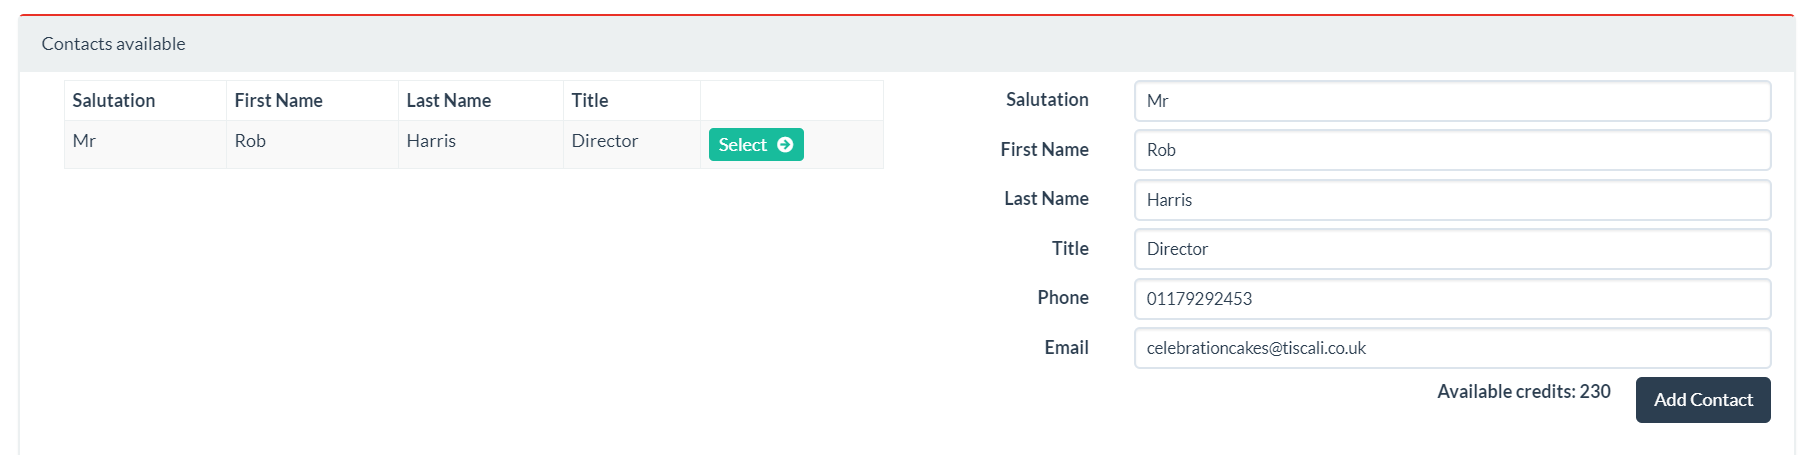
Select a contact record using the Select button, the fields can be edited in the same way as they can for Accounts. When ready to add a Contact press the “Add Contact” button. This will use 1 prospect credit

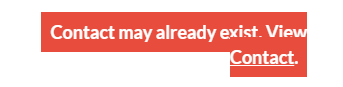
The Contact will be linked to the Account that was previously created, and a View Contact link will become available. If the system assesses that the contact already exists, a warning is displayed with a link to take the user to the existing record for review.
Using the Clean Scheduler
This functionality allows the organisation to setup regular cleaning of their Salesforce CRM data against the 3rd party data. This process ensures that company demographics, channel information, suppressions etc. are fully up to date, accurate, and compliant. To access the Clean Scheduler, click the Business Intelligence tab then click Clean Scheduler.
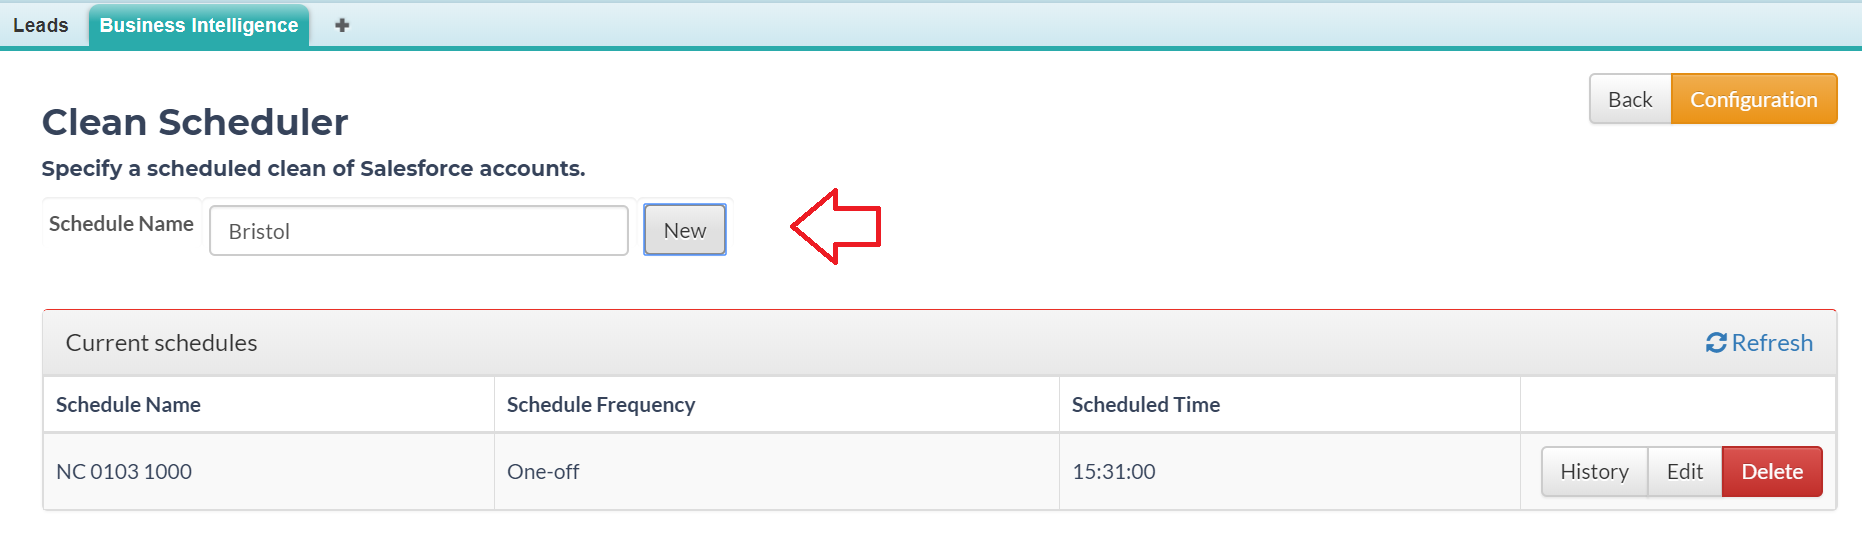
Creating a Clean Schedule
1. To setup a clean schedule, enter a name for the schedule and click New. As example we will setup a schedule to clean all record in Bristol every month.
2. Using the drop-downs and text box, specify the criteria that define the records for cleaning. Once each criteria is set, click Add. Multiple criteria are AND’d together.

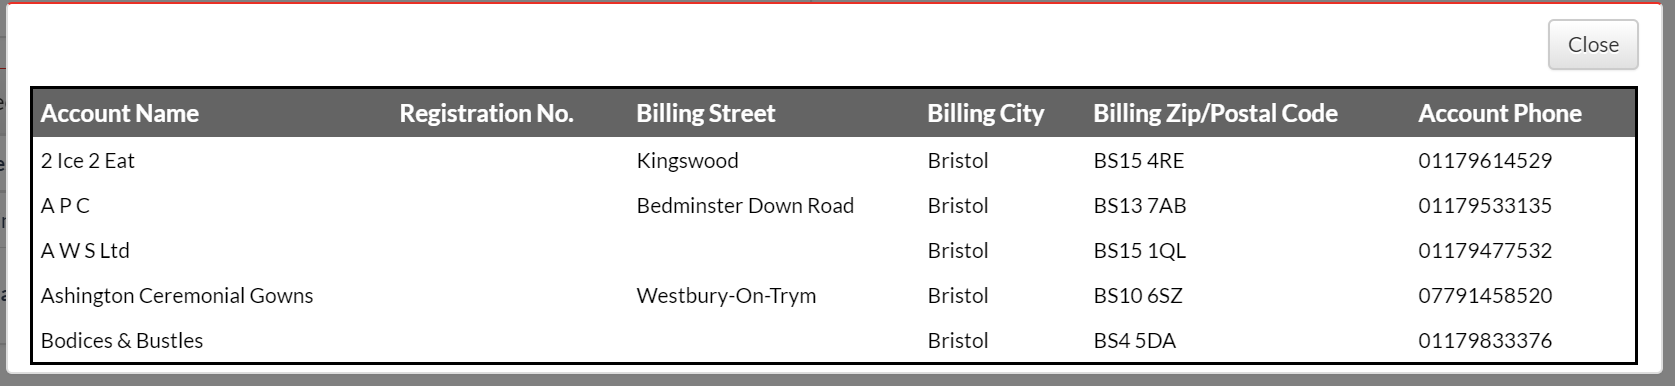
3. Once all criteria are added, click Count Records to obtain the number of affected Salesforce accounts. To remove a criteria click the Delete link. Ensure that the number is less than or equal to the Available Credits. If not then contact your Account Manager.

4. Click Preview to obtain a preview of the affected records.
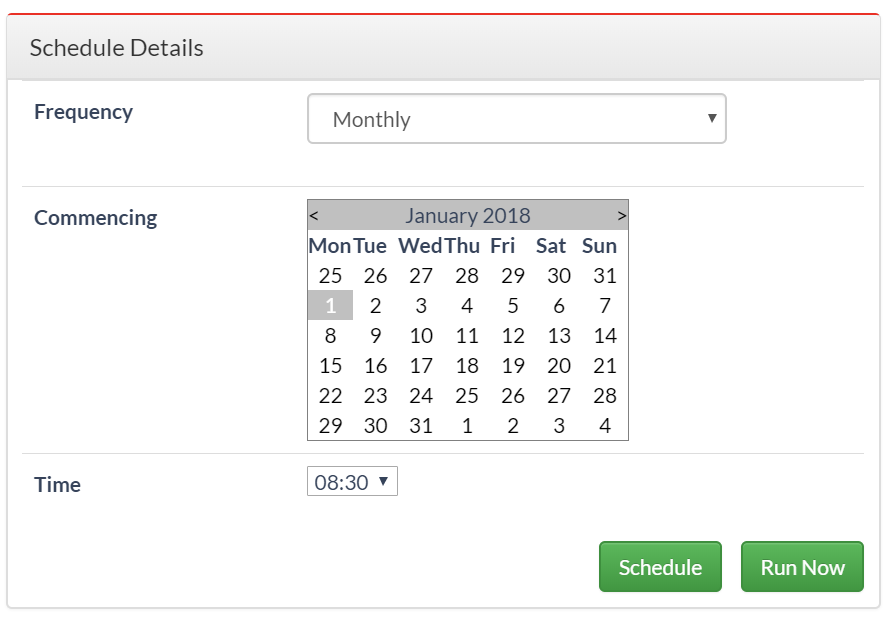
5. The new schedule may be run immediately by clicking Run Now. Alternatively, it may be scheduled to run repeatedly. Use the Frequency and Date - Time selectors to specify the first run. Click Schedule to save.
6. Click the History button on a schedule to review records sent, succeeded or failed.
7. Click the Audit Report button to download an audit of the last schedule run.
8. Each Salesforce account that is successfully processed will use 1 clean credit.
Using the Prospect Scheduler
This functionality allows the organisation to setup regular import of targeted prospects from the 3rd party data. This process ensures that the sales team always have clean, accurate, richly populated data to support their operation. To access the Prospect Scheduler, click the Business Intelligence tab then click Prospect Scheduler.

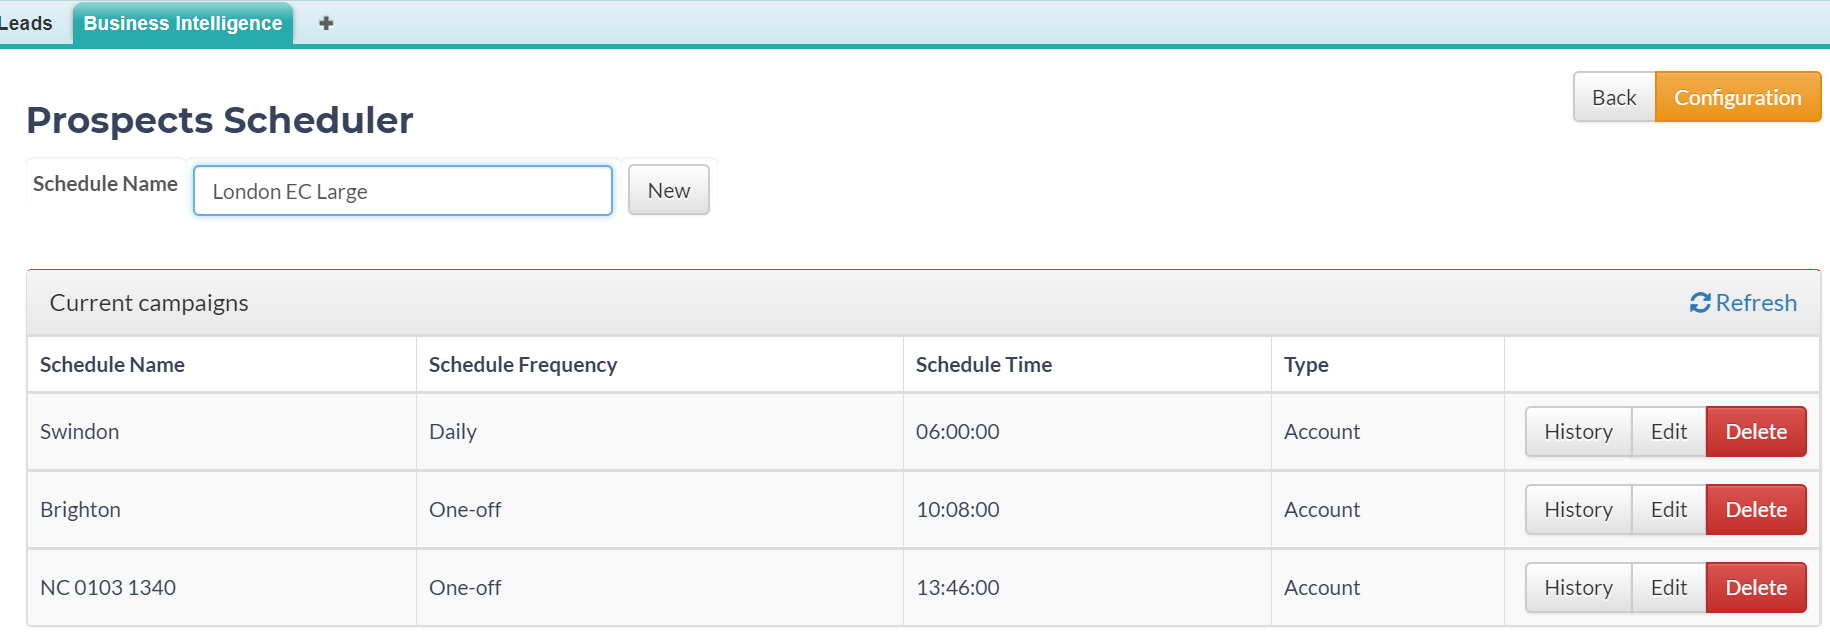
Creating a Prospect Schedule
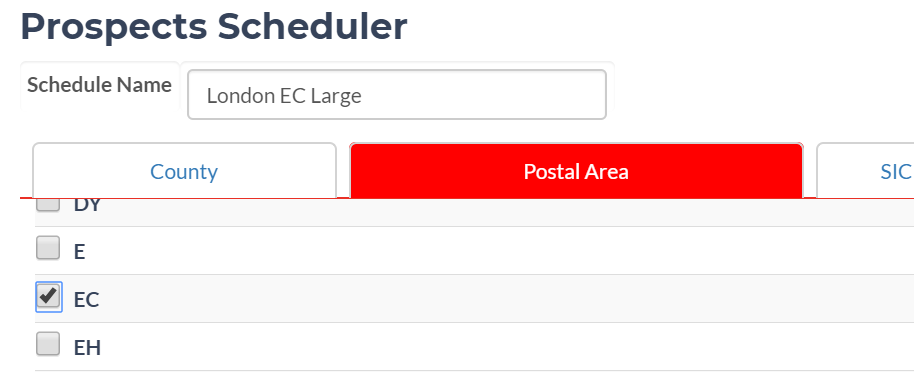
1. To setup a Prospect schedule, enter a name for the schedule and click New. As example we will setup a schedule to import all available 3rd party prospect records in London in batches of 150 every week until the available records are exhausted.
2. Using the tabbed selection builder, specify the required criteria to search the 3rd party data.
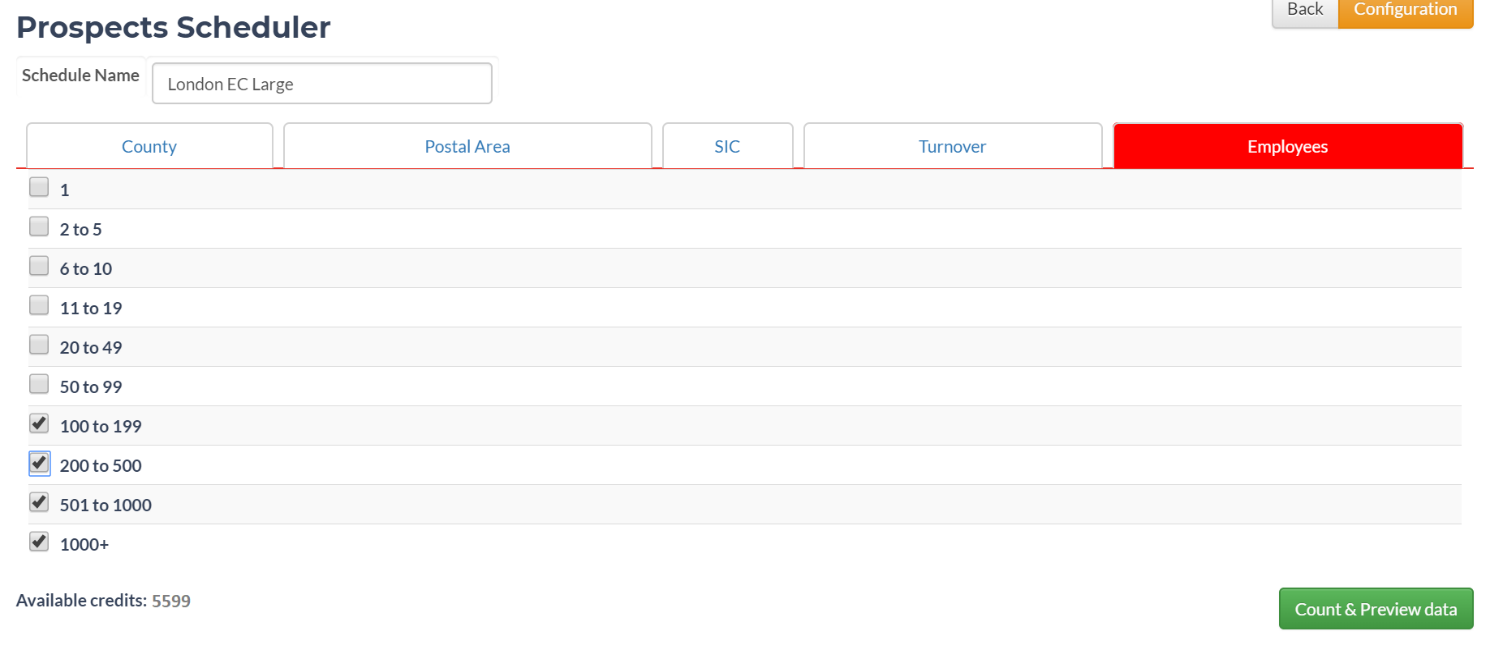
3. Once all criteria are set, click Count & Preview to view the results and the counts for Accounts and Leads. Ensure that your available credits equal or exceed your planned prospect import count. If necessary contact your Account Manager for more credits
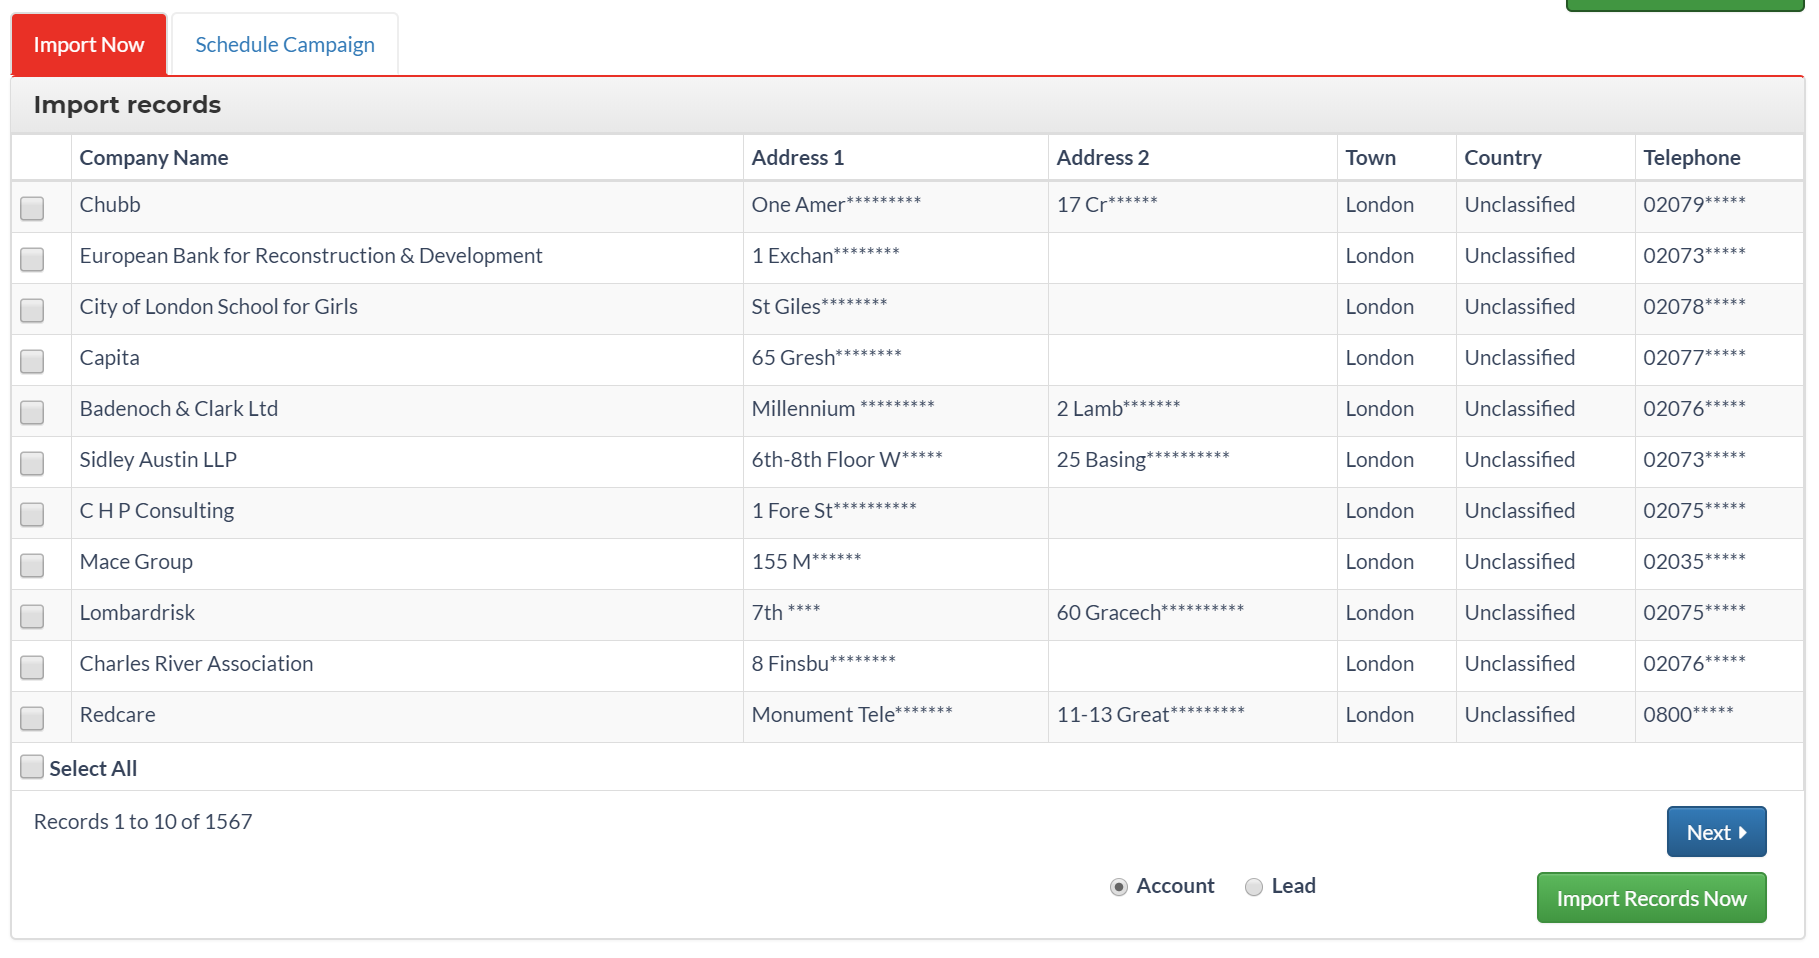
4. To specify specific records to import immediately, use the checkboxes, then click Import Records Now.
5. To import ALL records immediately, do not use the checkboxes, simply click Import Records Now.
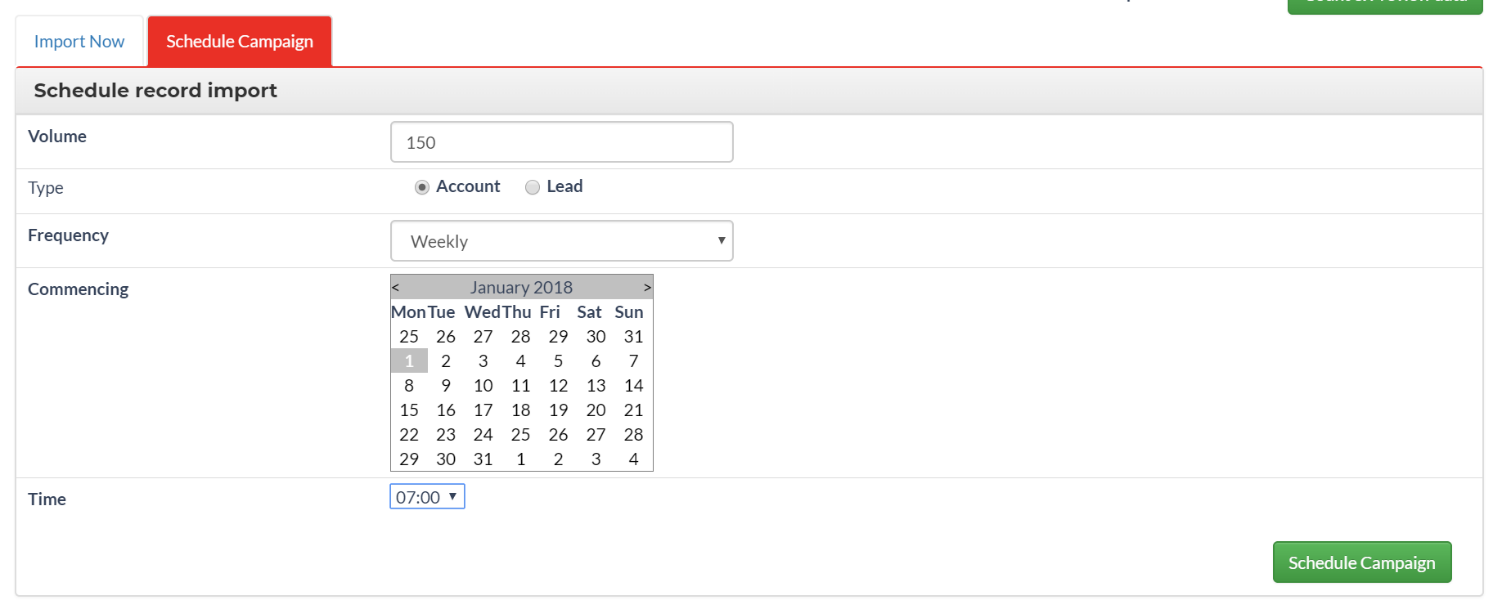
6. To schedule the import of the available records, click the Schedule Campaign tab.
7. Specify the volume of records to import on each run of the schedule, and the date time of the first run.
8. Click Schedule Campaign to save the setup.
9. Each company (account) or contact (lead) that is successfully imported to Salesforce will use 1 prospect credit.
Deduplication
The Prospect scheduler will import records from the 3rd party data using the built-in Salesforce deduplication rules to decide whether a given record may be imported. Click the History button on a schedule to review records sent, succeeded or failed.Any records rejected will NOT be deducted from available credits.
https://help.salesforce.com/articleView?id=duplicate_rules_create.htm&type=5
Identifying New Prospects
If you need to identify records in Salesforce that have been imported using the Prospect Scheduler, you can map the Schedule Reference field to a field on the Account or Lead.
Data Owner Management Tools
Adding/Managing Orgs.
1. In order to access the organisation and user management, click the Management button on the landing screen.
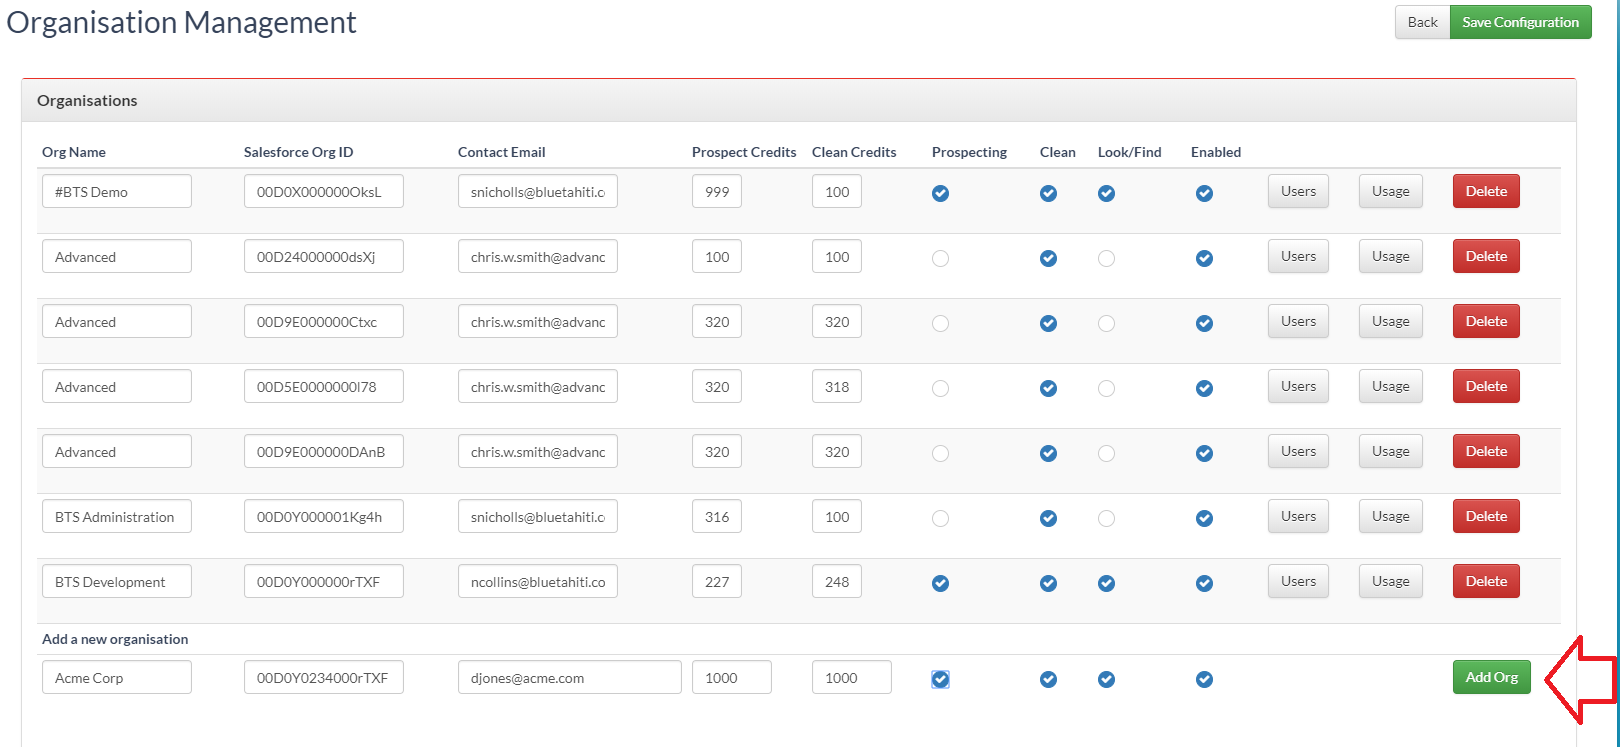
2. To add an organisation, enter the Org. Name, Salesforce OrgID, Contact email.
3. Select the features that are to be made available, and specify the initial credit limits
4. Click the "Add Org" button
5. To delete an organisation click the Delete button next to the organisation
6. To commit changes click "Save Configuration"
Adding/Managing Users
1. In order to access user management, click the users button for the relevant organisation on the organisation management screen.

2. To add a user, enter their Salesforce user name and click Add User
3. To disable a user uncheck the Enabled check
4. To delete a user click the Delete button
5. To commit changes click "Save Configuration"
Adding/Managing Fields
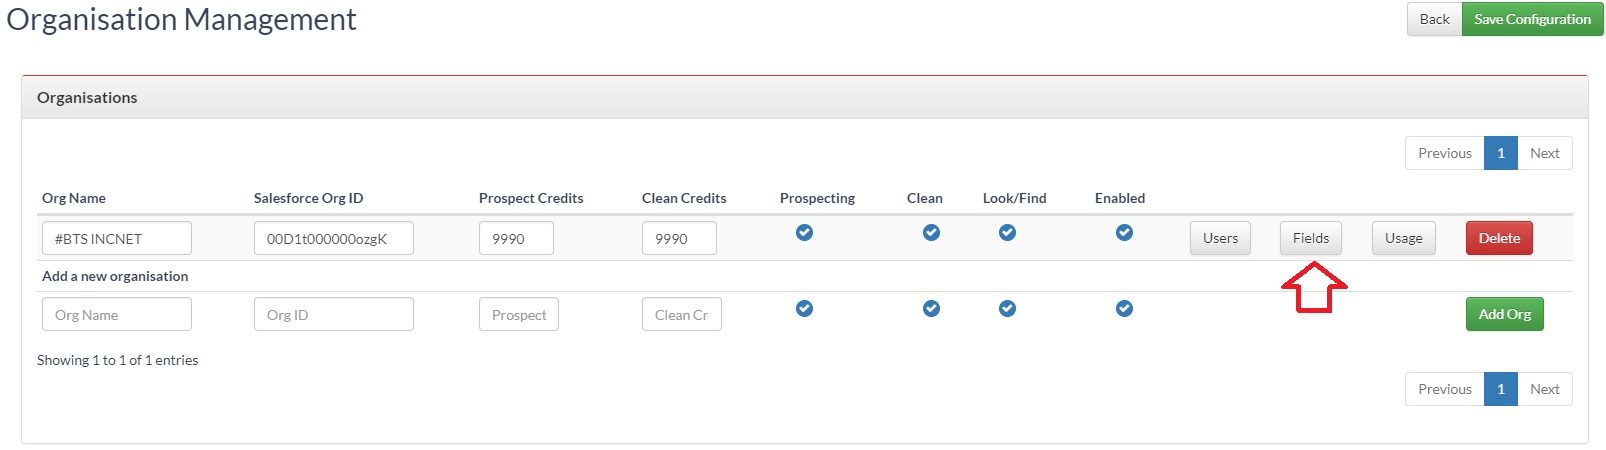
1. In order to access field management, click the fields button for the relevant organisation on the organisation management screen.
2. Select the fields that you want to make available to the client in Look/Find for mapping
3. Select the fields that you want to make available to the client in schedulers for mapping
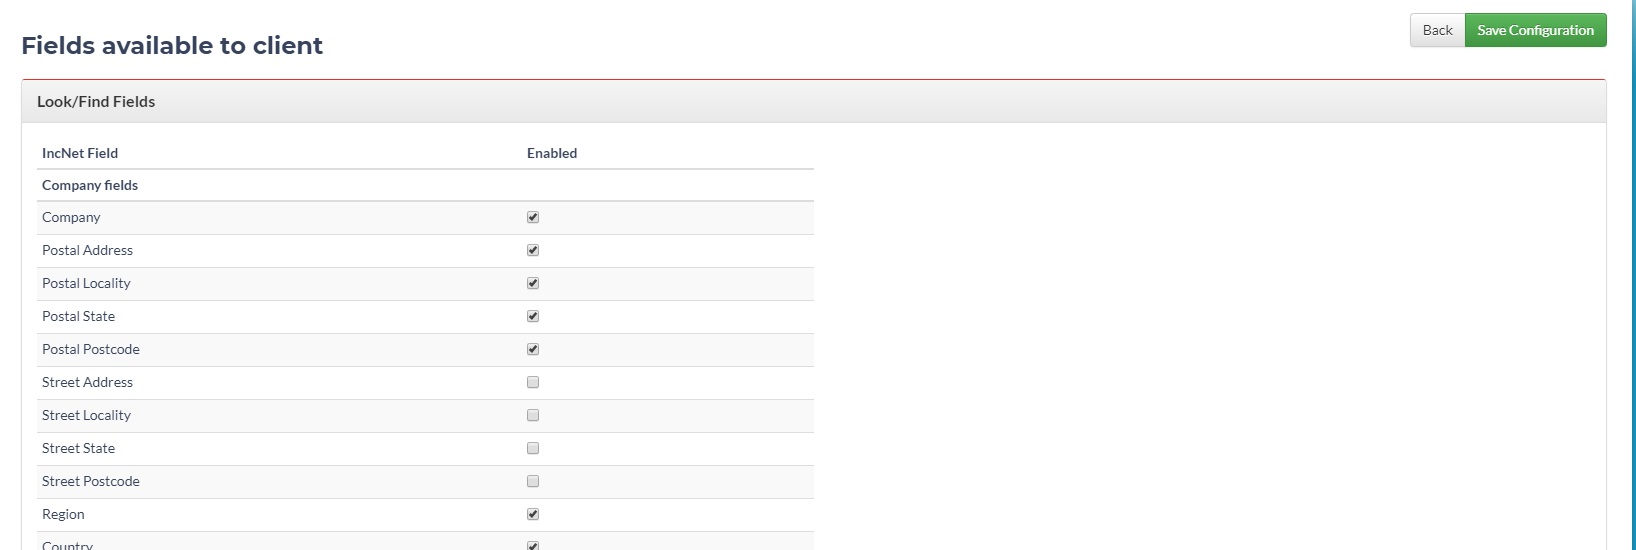
4. To commit changes click "Save Configuration"